New Player Help for Sekiro: Shadows Die Twice are a collection of tips and links to useful resources to help players understand the basics of the game's mechanics.
Helpful Pages
- Controls: Details the basic layout of the controller. Controls can be customized.
- Lore: Understanding Sekiro's time period and setting.
- Combat: Explains the basics of combat and Stats.
- FAQ: How to quit a mission? How to re-spec your character? And all frequent questions.
- Skills: Lists all available skills for all weapons and magics.
- Weapons & Armor pages: All available equippable gear so you can plan your build. You can also look at the Builds page for further suggestions
- Walkthrough: Sekiro from start to finish
- Endings Guide
- New Game Plus: What happens once you finish the game.
Sekiro Beginner Guide
From our Sekiro Beginner Guide
Stealth & Stealth Deathblows
Stealth in Sekiro is not overly complicated but it isn’t completely explained either, and enemies can see or hear you even while you are “crouched”. This is important to note, because you will need to keep an eye on their indicators to make sure you are not seen, unless you intend to be.
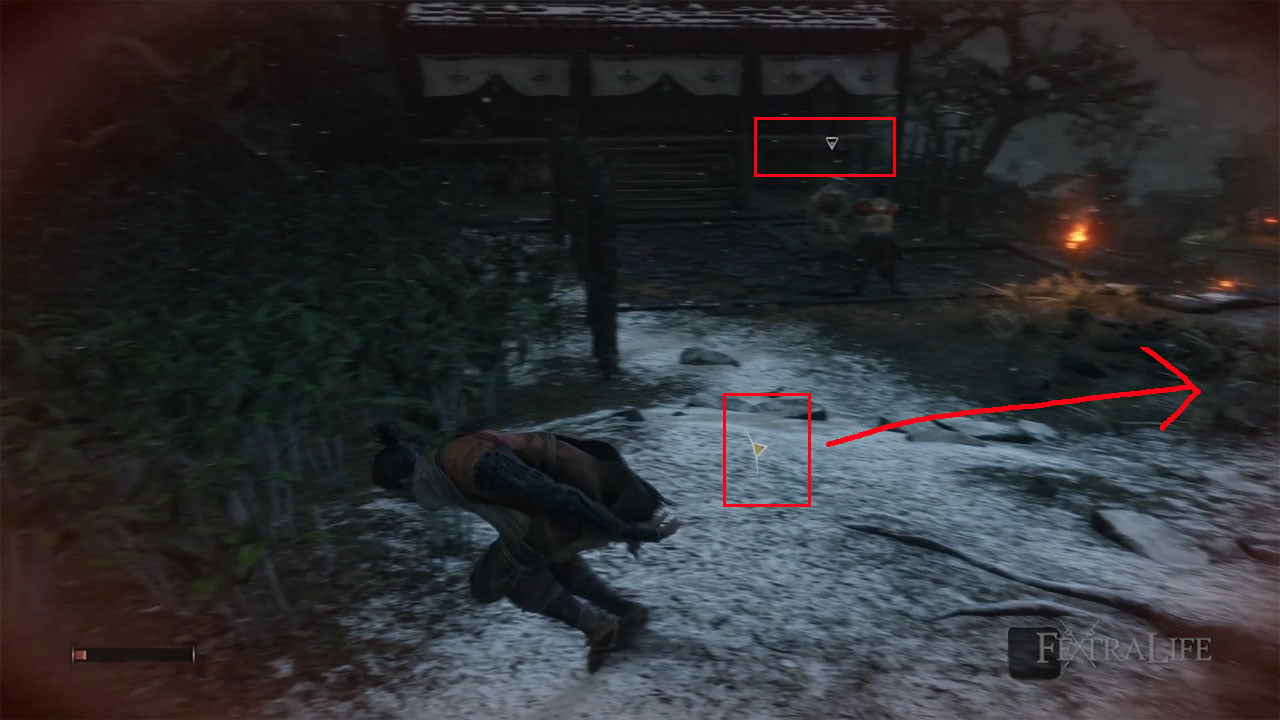
Enemies will have a white triangle above their heads once you’ve moved into their detection radius, and it will slowly start to change to yellow if you remain in it. Once the triangle is fully yellow, enemies become suspicious and will proceed to look for you. You can escape their interest if you remain hidden long enough out of their detection radius, similar to Assassin’s Creed. However, should they spot you this triangle will turn red and they will then attack you, or even call for aid.

These indicators help tell you what is happening. White outline with yellow center means you are being detected.
Crouching helps reduce the noise you make and the likelihood of being seen by enemies, and is done by pressing the left stick on the controller (L3). Note that if you jump or use your Grappling Hook, you will not land crouched but will need to click the stick once again. It is not required to be crouched in order to perform Backstab Deathblows, but it can help you perform them by allowing you to get close to the enemy. Note that you can only use Backstab Deathblows before the enemy has detected you.
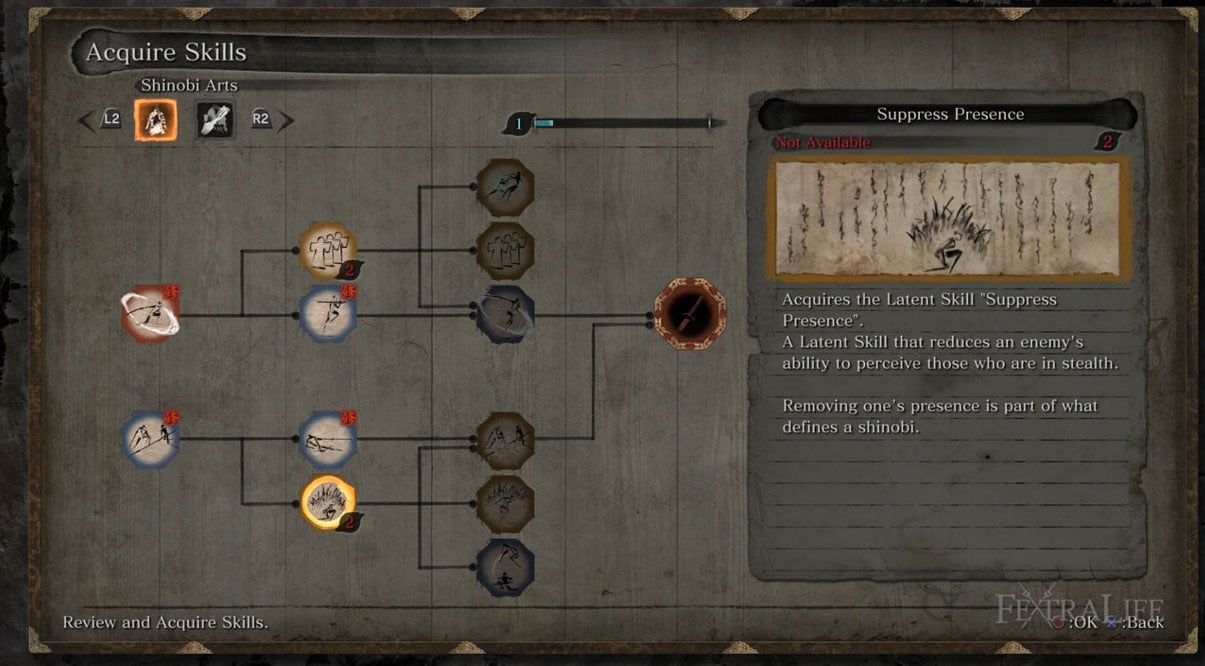
Stealth can be improved via the Shinobi Arts Skill Tree where you can spend Skill Points to obtain the Latent Skills: Suppress Sound and Suppress Presence. This Skill Line can be obtained very early in the game, and is given by the Sculptor after progressing a short ways into Ashina Outskirts.

Suppress Presence and Suppress Sound can help keep you hidden from enemies.
These will make it harder for enemies to detect you, and allow more room to maneuver without being seen. Be sure to pick these up if you’re having trouble remaining hidden, and be sure to check out our Stealth Guide for a more in depth analysis of Stealth.
Posture & Combat
Every character in the game has a Posture Gauge that fills when they are struck with an attack, when they block an attack, when they deflect an attack, or when their attacks are blocked or deflected. When a character’s Posture Gauge becomes full (flashes bright orange) they are vulnerable briefly to a Shinobi Deathblow. This includes Wolf himself, so you will need to keep an eye on your own Posture Gauge as well. Note that your Posture will regenerate faster if you are holding block (L1), which is completely contrary to the Dark Souls series. Posture also generates faster for both Wolf and Enemies when vitality is high, and slower when it is low.

In this image both of our Posture Gauges are full…a tense situation.
Filling an enemy’s Posture Gauge (and performing a Shinobi Deathblow) is the primary means of defeating enemies, and is the only way you can defeat Mini-Bosses and Bosses. Because an enemy’s Posture Gauge fills much faster when you deflect attacks than when you block or attack, you will need to learn enemy attack patterns in order to get the timing of these deflections down. Deflecting is done by pressing L1, the same button used to block, at the exact moment a blow would strike. The window is quite forgiving, and you can still deflect attacks even if your timing is off by a small amount. However, the more exact your timing, the less your own Posture Gauge will fill and the more your opponent’s will.
You can still defeat enemies by lowering their Vitality to 0, with the exception of Mini-Bosses and Bosses, as mentioned above. There are enemies in the game that take more Vitality damage than Posture damage when you attack, making this a valid strategy in many cases. In addition, the more a character’s Vitality is decreased, the slower their Posture regenerates. In some cases, you will need to deal damage with attacks and deflect in order to fill the Posture Gauge of your target. Note that a successful dodge fills neither the attacker’s or defender’s Posture Gauge, making it a useful, but less than ideal form of avoiding damage.

I should probably have made a meme out of this picture…
Perilous Attacks & Counters
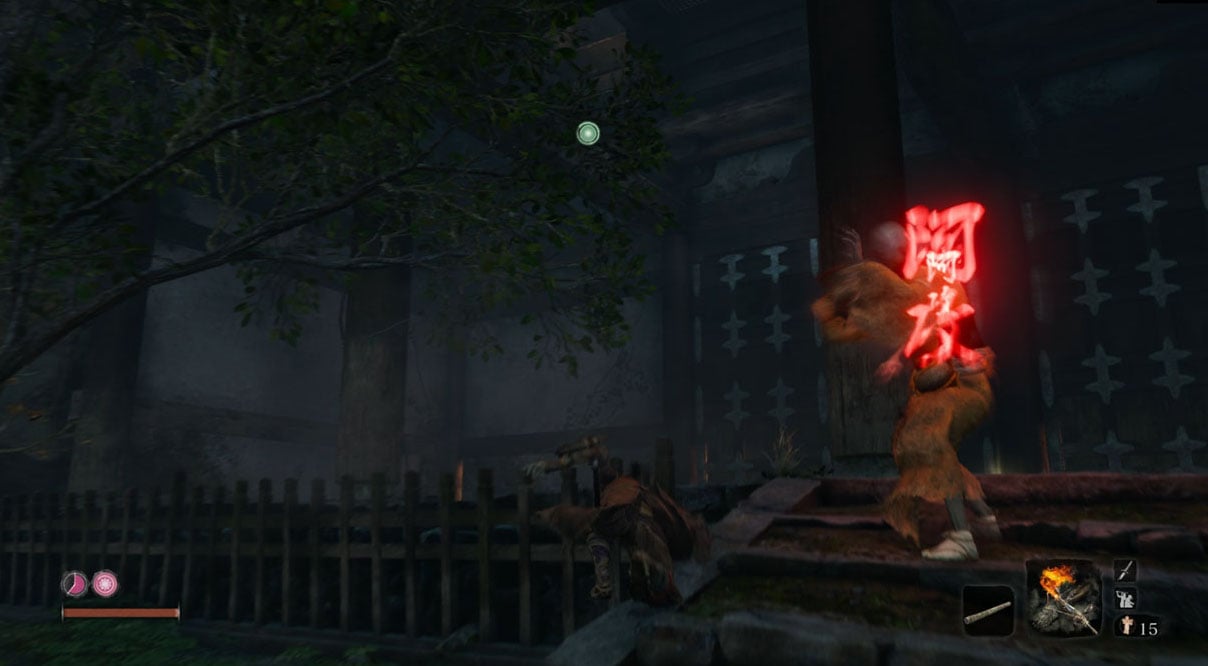
Sekiro: Shadows Die Twice features something called “Perilous Attacks” which occur when fighting more difficult enemies like Mini-Bosses and Bosses. You will know when they happen by the red Kanji that appears on the screen, and the distinct sound that you will hear. Depending on what type of Perilous Attack occurs you will be able to “Counter” it. Note that all Perilous Attacks can still be dodged and “thrust”-type attacks can be Deflected (not blocked!).

The red Kanji means you are in danger: watch out for it and Counter when you can.
Counters can be performed during Perilous Attacks, whereby the player does a special move at the right movement. These Counters don’t deal any Vitality damage to the enemy, but they deal significantly more Posture damage than a regular deflection, making them very important.
Players begin the game being able to Counter “sweep attacks” by jumping over the enemy’s weapon and kick-flipping off of their head. The Mikiri Counter can be unlocked from the Shinobi Arts Skill Tree and allows the player to Counter enemy “thrust attacks”. Later this can be improved to deal even more Posture damage when performed.

Pressing the jump button again after jumping over the sweep will perform this Counter.
One interesting thing about these Counters is that should fill an enemy’s Posture Gauge by using one, you will be able to do a special Shinobi Deathblow that is unique to that Counter. These look insanely cool, and make you feel like a super badass if you pull one off.
Skills & Skill Types
In Sekiro, part of player progression is unlocking Skill Trees and gaining Skills. Skill Trees are unlocked by finding Esoteric Texts, which are tied to doing specific actions, so please see the Wiki for the specifics.
Once an Esoteric Text has been found, players can spend their Skill Points to gain Skills from that Skill Tree, and there are 3 types of Skills:
- Latent Skills: Latent Skills are essentially “passive skills” that apply a boost of some kind, and do not need to be activated. For example, gaining more Spirit Emblems, or having a stronger Healing Gourd.
- Combat Arts: Combat Arts must be equipped by the player, and they can only have one Combat Art at a time. These can be changed at will as long as you have access to the pause menu, and more will be unlocked through out the game. These Skills have a redish background to their icon.
- Shinobi Martial Arts: Shinobi Martial Arts have a blue background on their icon, and they simply allow the player to perform more specific actions in combat. One example is the Mikiri Counter. You cannot perform it until you have acquired this Skill.
Players gain Skill Points via killing enemies and filling the blue experience bar at the top of their screen. They are spent at any Sculptor’s Idol, and each Skill costs a certain number of points. It is highly unlikely that a player will be able to max out all their Skill Lines in one playthrough without intense grinding, so plan accordingly, and take only the ones you really want.

This is what it looks like when you gain a Skill Point. Your bar flashes light blue for a moment.
Shinobi Prosthetic & Prosthetic Tools
Through out the game players will be able to obtain Prosthetic Tools that they can use in combat. These are found in various locations of the game, so please see the Wiki for their exact specifics. Once you have obtained a new Prosthetic Tool, you will need to visit the Sculptor in the Dilapidated Temple in order to outfit yourself with it. Once finished, it will be added to your arsenal that you can swap out at will. Players can have up to 3 Prosthetic Tools equipped at once, and these can be cycled through on the fly during combat.
Prosthetic Tools can also be upgraded after you have obtained the Mechanical Barrel, by visiting the Sculptor once again, after defeating Gyoubu Oniwa. This will create new versions of already obtained Prosthetic Tools, that can be slotted alongside your existing ones. Note that in order to upgrade you must have located the basic version of the Tool first, this is usually the “Loaded” version.

Once you defeat Gyoubu then you can upgrade your Prosthetic Tools.
In order to use Prosthetic Tools in combat, you will need to have Spirit Emblems. These act as a refillable “currency”, much like mana in other games, that prevents the player from just spamming Prosthetic Tool attacks at will. Players can purchase Spirit Emblems from a Sculptor’s Idol, gain them from defeating enemies, or find them through out the map. Each Tool has its own cost, with some being much higher than others, so pay attention to this when selecting your Tools to equip. Also note, that excess Spirit Emblems are automatically stored for you, and will replenish when resting at a Sculptor’s Idol, much the way Blood Vials or Silver Bullets did in Bloodborne.
Death Penalty & Resurrection
Throughout Sekiro, you will die numerous times, often with the chance to Resurrect. Should you suffer a true death, however, you will lose half of your current XP bar and half your Sen (gold). It does not matter whether you use Resurrection or not before a true death--you will always incur the penalty upon respawning at a Sculptor’s Idol.
In addition, every time you use resurrection there is a chance you will spread Dragonrot to the game’s NPCs, making them sick and temporarily halting their quest lines. This probability is different for each of the game’s NPCs, so some are more likely than others to be affected. Note that the Sculptor will always be the first to get Dragonrot, and that your Unseen Aid will reduce successively for each NPC affected.
Dragonrot is denoted in the player's inventory by items called Rot Essences, which are obtained as it spreads and can only be removed by using a Dragon's Blood Droplet. Note that merchants' stock of Droplets only seems to be limited. In fact, every time you cure Dragonrot, some merchant (usually Dungeon Mob) gets his stock of Droplets refilled, which lets you perform Dragonrot Restoration almost indefinitely.

At the first encounter with Dragonrot, a cutscene will occur and initiate a questline to find a cure.
Unseen Aid prevents the player from losing XP and Sen after dying and respawning at a Sculptor’s Idol, whether they used Resurrect or not. There is a default chance of 30% to receive Unseen Aid, which will reduce significantly with each subsequent infection of NPCs (for example, possessing two Rot Essences lowers the chance to 13%). Note that it seems impossible to increase your Unseen Aid past 30%.
 Anonymous
Noob question. Am I mistaken or am I correct in noticing that if you find a prosthetic attachment and do not return to the sculptor, you will lose the item? I want to say that I may have lost the bell in the same fashion.

 Anonymous
 Anonymous
Why in the ever loving **** did they make the Dragon's Blood Droplet usable? I used my first one thinking that's how it's supposed to be done. Nothing happened and now it's wasted

does the dragonrot increse when u resurect or when you die and respawn at a statue

 Anonymous
 Anonymous
Why is weapons and armor for builds when these arent even an option in sekiro?

 Anonymous
What do the two Red circles above the live bar mean? One with a leaf in IT, the Other with a sun. I red all the Guides and Forums but couldnt find an answer.

 Anonymous
You can hold down your attack button to make a long reach stab. This is really useful on short range enemies - you can often attack them, dodge back their counter and then stab into their attack.

 Anonymous
One piece of advice I have for all Soulsboure players is, remember, you can pause the game. Quick select is now there just for convenience. Rather than cluttering quick select with buffing items and affliction removal items, just keep healing there and if you're ever about to be poisoned or terrified, just pause and remove the affliction with the appropriate item in your inventory menu. It's far less stressful than trying to find it in quick select in the middle of a fight.

When your posture bar is high, holding down the block button will cause it to refresh at a much faster rate. This rate is affected by how much health you have. High health=faster recovery, low health=slow recovery. This will help against many bosses who take substantial chunks off your health, when they break your posture.


I can’t get the prosthetic skill tree even though I got the shinobi esoteric text. Anyone can help me?
0
+10
-1